THE EASIEST METHOD
Get some “Dr. Scholl’s” type shoe inserts designed to give comfort if you have bad shoes or bunions. Use a scissors to cut a roughly-triangular shape that will fit inside the ear. At the wider base of this flat triangle, cut a small inverted narrow V shape out so you’ll be able to bend the form into a curve. Fit it in the ear so that it is well down close to the canal and still is long enough to support most of the ear leather. Do not take the backing (release paper) off the adhesive-coated form until you have cleaned the ear. Clean the wax & dirt from the ears well with alcohol (dampen a cotton swab, or piece of cloth or paper towel), and cut the hair with the trimmer part of your electric shaver. Peel the release plastic off the cut piece, fit it well down into the ear shell, and press it with fingers to get a good full-surface adhesion. Distract the puppy with toys, food, etc. so he doesn’t think of this funny thing in his ear. It will probably do its training job before it gets loose, but check every couple of days to make sure there’s no excessive redness (which can result if the ear was not clean or you left a sharp corner on the form, for examples).
THE CYLINDER METHOD
If the base of the ear is weak, and the whole ear is soft-floppy, the ears might also be trained by putting a cylindrical form inside, and taping it in place—perhaps with a strip of tape running across the skull from the base of one taped ear to the other if both are weak. This would hold the assembly in an upright position instead of letting them fall to the sides. I have found the best combination of light weight (very important) and stiffness is the polyethylene foam pipe insulation used in construction of homes… perhaps you can find some tubes of this at your home-improvement or handyman shops. Or you can use a lightweight hair-curler core—those things some women roll their hair around to make it wavy/curly—if they don’t have sharp bristles. Or use a toilet-paper core, though these tend to crush flat pretty quickly. Best combo, if you can’t get a piece of pipe insulation, is to put the hair curler inside the paper core. Use thin “UPS-type” plastic packaging tape to wrap around the outside of the ear and the front where the core is. Make sure the assembly is well down inside the ear shell.
IF ONLY THE TOP OF THE EAR IS FLOPPED OVER
If the base is strong, and it’s just the tips that need help, the cyanoacrylate “super glue” is excellent. Some few ears will tend to curl backwards at the tips, while most will tip forward like a terrier’s ears. Either type can be helped by putting a short line of very few drops of the glue along the midline of the inner shell, only in the weak area that is falling over. Hold the edges together and in such a way as to straighten the set, not letting them curve to the sides. Pinch the center and hold it while the cyanoacrylate “cures”… a few minutes. It’s important to make sure the ears are straight while the glue sets up, because it’s difficult to remove it later. Long-coated dogs should have most of the long hairs scissored off or cut with the sideburn part of your electric razor before you begin to clean and glue.
Cyanoacrylate will eventually release by itself as hairs and skin cells are replaced during normal growth, or as the bondlines get wet from rain or loosen from normal earwax production. If you did it wrong and you have to re-do it, you can wet the bondline with nail-polish remover. That irritates the skin a little, though, so you might try some corn/vegetable oil or Vaseline instead, though that will not work as well or as quickly as the solvent. Best to do it right in the first place. It is not hard. The most difficult thing might be keeping the pup from wiggling and fighting the restraint.
After several days to a week or more, the glue will start to come loose. It will be hard-brittle, have some hair stuck in it, and gradually will become looser. No need to hurry, but if it is loose enough, you can pick at it like a scab if you wish. Most ears that curl or tip will respond 100% to this method. If the job did not work, let the pup have a few days off and re-glue them as long as there is no dirt or redness.
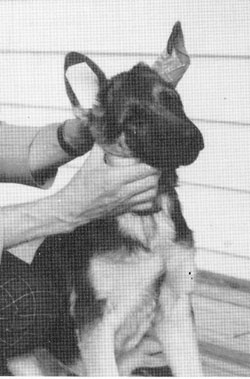
The accompanying picture shows two types of ear forms, one in each ear. To find more illustrations and answers for almost every other dog question you have, get my big book, The Total German Shepherd Dog (good for all breeds), available direct from me: Fred Lanting Mr.GSD @netscape.com or Mr.GSD @juno.com or search the web for my name/articles.